23 December 2009

Hand quilting a quilt

Quilting in progress.

Last week I basted together a quilt sandwich - pieced top, heirloom wool batting and backing- and began quilting it all together.

The tools of the hand-quilter's trade.

These are my tools:

A 22.5" quilting hoop, which I've had for so long
I can't even remember where I purchased it

Metal thimbles
1/4" inch quilter's tape
John James Stainless Steel Quilting needles, size 8

Gutermann quilting thread
Template plastic for making my own templates
Pat Campbell marking pencil, white

Thread Heaven silicon thread conditioner
which I've kneaded into a lump


A close-up - note the newer thimble, which has a ridge encircling the upper surface - only for use as the top thimble.

My basting work surface - a freshly vacuumed floor.
You can see the batting and backing are oversized and will be trimmed later
.

This quilt is a favorite traditional pattern, Snowball, in fabrics designed by Martha Negley, paired with two of Kaffe Fassett's Shot Cotton solids.


Where the action happens.

Good light is essential for hand-quilting, and, like lace-makers of old, I work close to a window, but also have a desk-top fluorescent Luxo lamp; not so good for color rendition but fine for directed illumination. When I demo hand-quilting I travel with my Ott floor lamp.


The red thread is my hand basting, which holds the layers together.
A contrast color makes is easier to remove
the basting thread when the quilting is complete.

I begin with the solid green areas, quilting to highlight the lozenge shape. The hoop tensions the area evenly.

Using the quilter's tape to get even spacing,
I start in the middle of a piece, well away from edges and seams
.

After running the thread through the silicon conditioner, I just make a double knot in the thread and pull the thread through the backing only, burying the knot in the layers.

One stitch at a time -
Practice makes even stitches which are the same size on back and front.

The needle bounces off the under thimble and is pushed with the upper thimble. Since Dritz no longer makes the traditional thimble without ridges, I will have to hunt for used thimbles once mine wears out.

Marking diagonals to center a circle template.

Once I've finished the solid green areas, I mark the diagonals using a metal ruler and the marking pencil.

Diagonals marked and ready.

Generally, the white markings will have worn off by the time I've finished quilting. If need be, a fabric eraser can be used to remove any lingering traces of marking.

A 3.5" circle, cut from template plastic, positioned
within the 4" circle already drawn.

I align the grid of the template with the white marked diagonals, to ensure the circles are centered.

Twin needle quilting.

With the first snowball quilt I made, I quilted a single circle to make the "snowball". Upon reflection, this looked a little wimpy, so subsequent quilts have a double line of quilting to make a more emphatic circle shape. To speed things up I use two needles - I'll quilt the outer circle, then the inner curve, and then re-position my hoop, since much of the time taken by hand-quilting is in adjusting the position of the hoop.


In raking light, the pattern emerges.
Backing fabric is a batik.

I'll post an image of the quilt when it's done. I use the hoop as a measure of work done, and each hoop takes about 90 minutes. Audio books are good companions for this work.

30 November 2009

Design Research display, Cambridge MA, 2009


Lengths of Marimekko fabric cascade down the stairwell

The day before Thanksgiving we went out to dinner with some friends, classmates from college we hadn't seen in twenty years. We left home a bit early and went to see an unusual exhibit on the way to our restaurant. In a space most recently occupied by Crate and Barrel, but known to architecture aficionados as the Design Research building, there's an installation of items from the glory days of retailer Design Research, or D/R for short.

This defunct but still influential merchandiser brought Scandinavian design - the good stuff, not the imitations - to American living rooms in the 1960's and '70's.

The retail space is for rent, so the landlord graciously allowed a local group, spear-headed by Jane Thompson, to put on a show, so to speak, of items from the glory days of D/R. No admittance, so all my photos are through the large glass window walls.

D/R introduced Marimekko to North America

Marimekko was founded in 1951 by Armi Ratia, a woman who took over the ailing Printex company, and created fresh wearable clothing, as well as designs for home furnishings.


Shirts and stripes


Eero Saarinen designed the table and chairs


Another interior with the signature look of neutral sofa
paired with pillows in prints of intense color


Looking at the building from Brattle St.


View from Brattle St.

I don't know if the building has some kind of landmark status or not, but it should. For more on this gem of a building, visit
http://www.greatbuildings.com/buildings/Design_Research_Headquart.html

29 November 2009

A Quilter's Gathering 2009

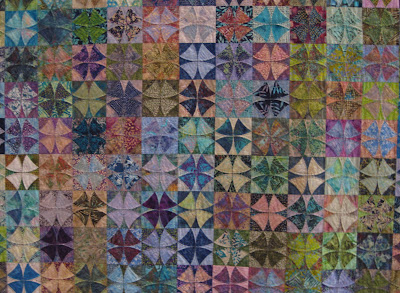
Detail, Wellfleet Waves, by Kate O'Leary, a member of my quilt guild

DH and I went to A Quilter's Gathering, an annual four-day festival of quilts, classes, vendors and special events held at the Radisson Hotel in Nashua, New Hampshire, http://www.aquiltersgathering.com/index.htm

I like this show particularly, as the adjudicators balance classic and innovative quilt-making, and there's usually lots of sophisticated use of color, as in the image above.

A highlight of the show was a display of quilts made by long-time Chelmsford quilter and teacher Sally Palmer Field, constructed using antique and commemorative fabrics she's collected. The fabrics are just extraordinary.

Old Lowell quilt, detail. A sampler style quilt made exclusively of antique fabrics made by mills in the Lowell area

Old Lowell quilt, detail


A piece of centennial fabric Ms. Palmer collected


World Columbian Exposition of 1893
The center of this quilt is a commemorative handkerchief from this event
The striped fabric in the field was made by
the Cocheco Mill in New Hampshire

A close-up of the handkerchief, with views of the exposition in each corner

Tribute to Teddy Roosevelt
The center is a commemorative handkerchief

Detail, Tribute to TR
Click on image to enlarge.
Note initials TR quilted in corners adjacent to center square

Ulysses Grant; another rare commemorative handkerchief forms the center panel

The commemorative handkerchiefs and bandanas of the type found and incorporated by Ms. Palmer into her quilts are seldom exhibited, so this display was a rare opportunity to see them, as well as the other vintage fabrics in the quilts.

Back to the contemporary show quilts; there were many to admire.


Blowin' in the Wind, Nancy Egan Vogel

Off Shirley's Rocker, Rose Orr

Off Shirley's Rocker, detail
The pineapple blocks in the corner add interest to the lone star pattern


Marilyn's Rooster, Barbara Beaumont
The box label was printed digitally and then tea-dyed for an aged look


It's hard to see in my photo, but the rooster's feathers are skillfully machine-quilted. I'm not usually a big fan of representational quilts, but this quilt is a great marriage between image and technique.

Impressive technique is also show-cased in the quilt below, which the artist began in a piecing workshop with Ruth McDowell, http://www.ruthbmcdowell.com/

Maple in Fusion, Valerie Daniels, detail

Finally, there were the vendor displays.

Elin Noble's stall, with her hand-dyed fabrics

I couldn't resist posting this sign - antiquated indeed!

11 October 2009

Sashiko embroidery class

Finished sashiko embroidery

In September, 2009, I joined three other artists - one all the way from Maine - in a beginning sashiko class, taught by Miho Takeuchi, at the New England Quilt Museum. Like many under-funded cultural institutions, the Museum's programmatic needs don't fit well within its space, a former bank building. Classes are held at a table set up at the shop, but somehow the mercantile setting - we were on display as we stitched - was fine, and at least it was easy to buy supplies.

Miho is a very good teacher and her website is: http://www.designbyaika.com/

Sashiko is a very old Japanese technique, derived from a thrifty habit of quilting farmers' jackets for added warmth.

For this beginning class we used:

Pre-printed pattern on sashiko cloth, a loosely woven, plain weave material
A fat quarter of plain weave fabric of our choice, loosely woven

Sashiko thread, a low-twist, low sheen multi-ply filament;
plies are not separated when used
Sashiko needles, similar to crewel embroidery needles

Waxed carbon paper, such as Chacopy, made by Clover
Blunt edged tracing wheel, also available from Clover
Sheet protectors
Lightweight flower pins

General sewing supplies: thimble, scissors, pencil, notebook

Sashiko supplies

Miho showed us how to handle the skein of thread to prevent tangling, and after cutting an 18" or so length we began. Sashiko is an exercise in linear program, as one seeks to stitch all the lines of the pattern with a minimum of back-tracking, start-and-stops, and wasted thread. The technique is a simple running stitch with two or three stitches loaded on the needle at once before the thread is pulled through.

Stitching diagram

First lines - horizontals, straight diagonals, then moving diagonals

Miho doesn't knot the thread on the reverse side - she weaves a short tail back into a few stitches to secure. I learned not to do this back-stitching until I was finished, but instead to just leave the length of thread unsecured. This allowed me to use the dangling thread to pick up any partial motifs.

Below are sequential images of the project


All finished except for the frame around the pattern
Image at top of blog show completed pattern

Back of work showing back stitching at beginnings and ends, and carried threads
Care is taken to prevent puckering


No hoop is used, so it's important to maintain a loose tension on the thread. Whenever I had to carry the thread on the back, I was careful to make the carry very loose. For a good result visually, Miho pointed out that we should pay special attention to the stitch length in any area where many stitching lines intersect - such as at the circles at the center of the "stars" in the pattern above.

After we had a good start on the pre-printed pattern, which I finished at home, Miho also showed us how to transfer patterns to unprinted cloth. Miho slips a pattern inside a sheet protector, places the waxed carbon paper face down onto cloth and then transfers the pattern with firm back and forth strokes using the tracing wheel. The wheel indents the pattern onto the sheet protector, making it easy to track progress.

Tools for pattern transfer:
paper pattern, sheet protector, carbon paper and tracing wheel,

all placed on solid blue fabric


Flat flower pins don't get in the way of the ruler when marking straight-aways
You can't see the carbon paper but it's under the sheet protector

Of course, the indented sheet protectors can be reused; just transfer the design in some systematic manner, or mark each finished line in some way.

Some traditional patterns

My wave pattern, transferred, and in progress

Reverse of wave pattern, showing the carried thread

For the class I brought some Robert Kaufman Kona cotton, but I wouldn't recommend this material. It's too tightly woven, so the thick sashiko thread is restricted as it goes through the snug weave, and doesn't relax as flat as it does with the sashiko fabric.

The Japanese fabric available at the New England Quilt Museum is gorgeous, distributed by a company called Olympus and is vegetal dyed. This may account for its price - $27/ yard. According to Purl Soho, Kaufman's Essex fabric, a linen/cotton blend, works very well for sashiko and Purl sells this fabric for $9.00/yard, http://www.purlsoho.com/purl/products/fabricdetail/3539

Of course, when you transfer your own pattern, you don't have the perfect stitch layout all marked for you, as on the pre-printed fabric. After completing the pre-printed design however- and there is something soothingly meditative about this work- you develop almost a muscle memory for the stitch.