|
| Plants arranged on a length of cotton. |
On a very hot recent August day, seven women, including me, joined fiber artist
Mary Delano for a full day workshop of eco printing, sponsored by the Massachusetts Horticultural Society.
What is eco printing? It's making designs on treated fabric using found plant material. The pigments found in the leaves and flowers deposit onto the fabric, resulting in one-of-a-kind creations. Results are hard to replicate, so the emphasis is on experimentation and exploration, although there are some procedures to follow. Some well-known practitioners, in addition to our instructor, include
India Flint and
Jane Dunnewold.
Our hard-working instructor gave each participant eight narrow lengths of diverse fabrics - including repurposed tablecloths, raw silk, and a hemmed silk scarf - all of which she had soaked in mordant.
 |
| Flowers and leaves positioned on fabric. |
 |
| End result! (detail) |
First, I took the mordanted cotton fabric and wet it in plain water, wringing it out well. For this exercise we also dipped this fabric in tannin, which acts as a modifier. Then I placed the damp piece of fabric, treated both with mordant and tannin, on plastic wrap. Next, geranium and Japanese maple leaves and black-eyed susan flowers were positioned onto the fabric. Finally another piece of cloth - NOT mordanted but dipped in a solution of iron (ferrous sulfate) was placed on top, forming a sort of sandwich of vegetation between two differently-treated lengths of cloth. Finally, the "sandwich" is rolled up, plastic and all, on a plastic wrap-covered wooden stick (looked like a piece of broom handle.)
NOTE: it's really important to wear gloves while working with the iron solution, as it will stain your hands. Also, never use utensils and tools used for dyeing for food preparation. The dyes and plants are natural but the chemical mordants and modifiers can be toxic, so take precautions when working with these substances.
 |
| Leaves and flowers "sandwiched" between treated pieces of cloth. |
 |
| Fabric and leaves rolled around a thick wooden stick. |
The tightly rolled bundle is then tightly tied with string. It's really important to roll and tie tightly, as the flowers and leaves need good contact with the fabric to deposit pigments. Once we had all rolled a bundle, Mary steamed them in a lobster pot, fueld by propane and outside the studio. The bundles steam for an hour, with an old towel draped over the steaming pot to slow down evaporation.
 |
| Fabric bundles steaming away. |
Using old slow cookers, Mary also had some dye pots ready for us, including dye made from purple beech leaves. I put the raw silk length into this dye bath for about 30 minutes, resulting in a muted brown. I imagine Friar Tuck, from the Robin Hood tales, wearing robes of this color.
 |
| Raw silk dyed with purple beech leaves. |
|
|
|
I placed a number of birch leaves and hydrangea florets onto this cloth, rolled and steamed it, but the imprints were almost invisible. However, with this approach to surface design, you can try again - just take the damp fabric and put more, and different, leaves and flowers on it and re-bundle. I did this, using Japanese maple leaves and coreopsis stems and had much better results.
For another dye bath, Mary dumped goldenrod - leaves, stems, flowers and all - into another slow cooker, let it stew and voila! - a beautiful bright yellow, seen below.
 |
| I like this just as it is. |
After the bundles steam for an hour or so, it's time for the Great Reveal. Here we are, in our pandemic masks, unrolling one creation on an old towel. It was so exciting we could hardly wait for the bundles to cool off, and steam escaped as we opened the work.
 |
| Anticipation. |
 |
| Removing the spent leaves. |
 |
| Andrea had done this before and brought some plants from home. |
 |
| Some of our materials - birch leaves and hydrangea. | |
 |
| Drying in the sun. |
 |
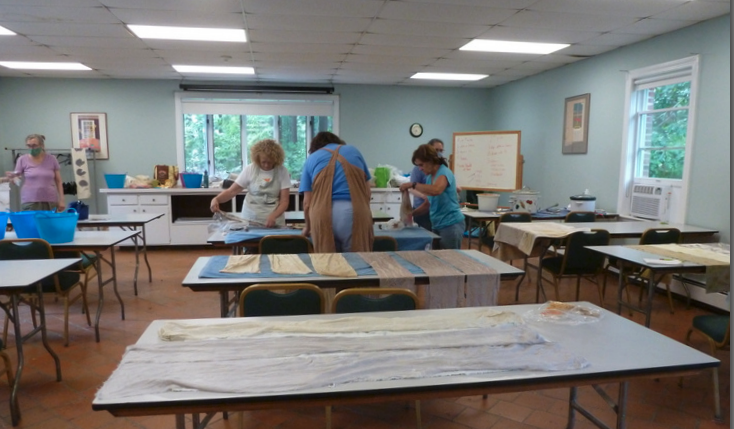
| Our workspace. |
Do you see the air-conditioner in the image above, in the window to the right side? This piece of HVAC equipment imitated the sound of a jet engine, so most of the time it was turned off, so we could hear Mary. The room became a bit toasty, but we must sacrifice for art.
 |
| Mary printed petals of a giant hibiscus flower. |
 |
| My seven samples, at the end of the day. |
Back home, I heat set my sample with a steam iron, and won't wash for 3 weeks, if indeed I wash them at all. Mary often adds embroidery to her pieces and I can see that stitching would add texture and some depth to these pieces.
 |
| Queen Anne's Lace, stems and all, on silk. |
Resources and supplies, courtesy Mary Delano
woolery.com: tannin, iron, copper, alum, natural dyes
maiwa.com: tannin, natural dyes
dharmatrading.com: silk scarves and fabric
prochemicalanddye.net: alum and sodium acetate
hillcreekfiberstudio.com: iron sulfate and copper sulfate
Facebook Group: Printing with Botanicals
Some of Mary's favorite plants for printing:
Japanese maple, other maple, sumac (leaves and cones separated into little pieces), birch, oak, locust, threadleaf coreopsis (flowers and stems with leaves), rose leaves, Lady's mantle, peony leaves, lupine leaves, begonia flowers and red leaves, osteospermum (dark red flowers), perennial geranium (leaves and flowers), raspberry, blackberry, strawberry (leaves), black-eyed susan (trim cone so flower lies flat), goldenrod (flowers and stems with leaves), false indigo or baptisia (leaves), marigolds, purple smokebush (leaves and "smoke")