 1. Elin with unknotted fabric after indigo dip.
Supplies we used:
Large bucket - up to 5 gals - stainless steel or plastic
Smaller bucket - 1 gal - stainless steel or plastic
Freeze-dried indigo
Stirring implement (wooden spoon)
Plastic teaspoon
Rit Color Remover
Sodium Carbonate (washing soda)
Sturdy household gloves
Fast Orange hand cleaner
Hand Lotion
NOTE: Once an implement is used for dyeing DO NOT use it for anything else.
 2. Some of our supplies.
 3. Elin's indigo vat.
 Note metallic bits floating on top.
Liquid is blue but has some translucence.
(White strip is reflection of overhead light.)
Elin put about two to three gallons of warm tap water into her bucket and added about a rounded half-teaspoon of the freeze-dried indigo. Since the indigo is flaky crystals, not powder, it doesn't become airborn as a fine powder might, so no need for a mask. (Still, don't inhale it.) In class, measurements were a little informal, but our handout, credited to Judith McKensize McCuin, states water should be between 100 and 120 degrees, and to use one tablespoon of indigo per five or six gallons of water. When Elin initially added her dry indigo to the water there was a green flush as the dye hit the water, although I blinked so I missed it. It's important to stir the mixture gently - no vigorous swishing. Air bubbles, foam, froth are all the enemy, as we want to keep oxygen out of the indigo.
 4. Elin bundling her wetted fabric clumps into her gloved hands,
 handling the fabric under water.
All items to be dyed are thoroughly soaked first. Small items can be linked together loosely with string to make a chain of items for easier handling. Elin gathers up the items into her gloved hands, all under the water, and, hands still enclosing the fabric, carefully submerges the clump into the vat. Then, still working beneath the surface of the dye solution, she opens the clump and massages the fabric, while chanting "ohm, ohm, ohm..." Well, okay, maybe not that last part, but the idea is to make sure that the dye solution bathes the entire fabric, has a chance to deposit itself on the fabric, and that the oxygen is kept well away - again, no swishing, and no lifting the fabric in and out of the bath.
After a few minutes, Elin again bundled the now-dyed fabric into her hands and lifted out the bundle, breaking the surface with back of her gloved hand, to avoid getting those floating metallic bits onto the fabric. If there are metallic deposits, just rinse off in a bucket of clear water. In her studio, she would rinse the fabric, then let it rest - I'd love to see her set-up for work in progress - and re-immerse the fabric after an interval, say, the next day. Again, we refer to this process as multiple dipping, but it's not dipping the fabric up and down, just successive immersions. It's multiple immersions that really build up depth of color, as well as long-term color retention and fastness.
 5. Elin's massaging the bundle in the dye at the bottom of the vat,
 almost up to the cuffs of her gloves.
 6. Elin's removed the bundle from the vat.
 This pic gives an idea of our class set-up.
Elin showed us that, through her manipulation of the fabric beneath the surface, the dye had a chance to "hit" all surfaces of the item.
 7. Elin beginning to remove the stitching, using a seam ripper.
The process of tying and untying the stitched resist pattern will be described in a companion blog entry, but, briefly, Elin has pulled the tied threads ends to create a little give, and inserted a seam ripper CAREFULLY in between the threads. It's easier than you can imagine to cut the fabric by accident.
 8. The pattern emerges as the fabric is unfolded.
  9. The sampler of stitches we learned in class.
  10. My Arashi, or pole-wrapping, sitting in Elin's dye vat during lunch.
  11. My fabric bundles, soaking in room temperature
 water prior to going into the dye vat.
Well, time to prepare my own individual vat of indigo. I filled my big orange Home Depot bucket with about three gallons of warm, verging on hot, water, and measured out about a half-teaspoon of indigo. On reflection, I think it would have been all right to use more, but I can experiment at home.
 12. Our individual containers of indigo.
It looks like Folger's freeze-dried coffee crystals.
 13. The indigo.
 (A staged photo taken at home.
I couldn't hold the camera and the spoon at the same time.)
 14. My dye vat.
 (White area is reflection of overhead fluorescent light.)
In went the indigo crystals and I stirred gently. Again, I find it difficult to see the initial green tint, but I trust it was there, and the dye bath developed the correct translucency and metallic sheen when mixed. I added each fabric bundle, gathering it up into my gloved hands and releasing it below the surface of the dye bath. After manipulating the fabric for a while, I carefully removed it, avoiding those metallic bits, placed the fabric on a wad of paper towels and went on to the next item. I had done some homework before class, so had quite a few bundles, and exhausted my dye bath - at some point when I added a piece of fabric, it emerged an anemic pale blue, not the darker color of the items dyed earlier.
Since the solution was still warm, my technique was probably too splashy; whatever the reason for the depleted effectiveness, it gave Elin an opportunity to show us how to recharge the vat.
 15. My exhausted dye bath. (White streak is that overhead light again.)
 Symptoms of vat exhaustion: liquid is opaque, with no translucency. No tinge of green anywhere. No metallic sheen or coppery floating patches. Compare image number 14, new vat, to number 15, tired vat.
 16. Rit Color Remover. The active ingredient is sodium hydrosulfite.
Rit Color Remover - also useful when your inexperienced offspring wash something red with the white load, turning everything pink - is widely available. Chemically, it's a sulfur-based reducing agent - it gets rid of those pesky hydrogen molecules that have glommed onto the indigo when too much oxygen got into the vat. Color Remover is very very hygroscopic - it wants to absorb moisture, so keep the unused portion tightly sealed. In humid New England, it's probably not a bad idea to keep the box in a zip-lock bag, for good measure.
 17. Elin, measuring out about one quarter teaspoon Color Remover, for my vat.
In addition, Elin added about one eighth teaspoon of sodium carbonate, or washing soda, which also reduces the vat, again getting rid of the hydrogen atoms. I'm sorry I don't have a picture of the product, but here it is from a commercial dye supply website.

18. Sodium carbonate.
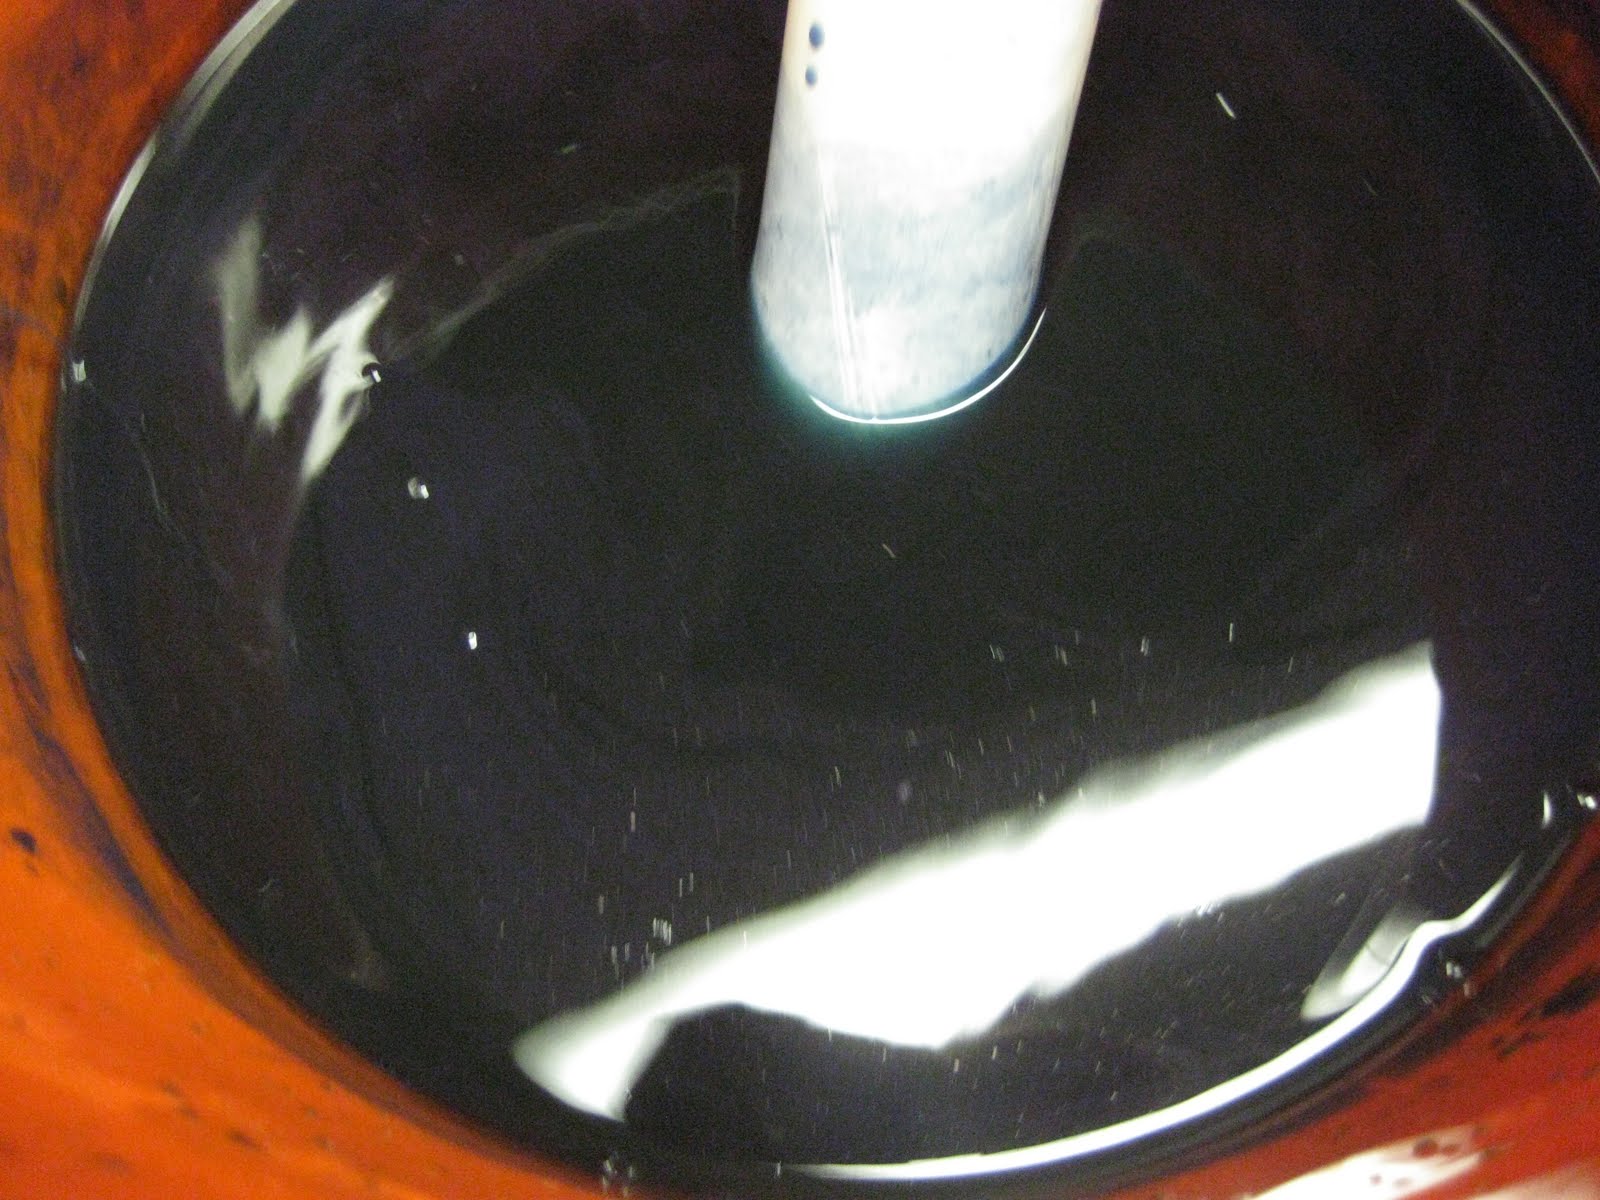 19. My recharged vat.
 Note pale green translucency where the liquid meets the the pole.
The oxygen is out; ready to dye some more.
 20. My pole dye fabrics just out of the dye bath. Fabrics have a greenish tinge; this soon turns to blue as the indigo oxidizes, grabbing those hydrogen atoms from the oxygen in the air.
  21. A pile of colored fabric bundles turning a nice blue in the air.
 22. For hand clean-up - Fast Orange hand cleaner, which really worked, and lotion.
 A note on photography. I do not use flash, because I think it's rude to subject people to flash photography in a classroom setting. In addition, most of my fellow students, and I, are women of a certain age, and recovery from flash glare is slower for us. I don't want anyone knocking over a dye bath because she was momentarily blinded by glare from my camera. So, I rely only on available light, with the accompanying slow shutter speeds. Not ideal, but the goal is images that provide a helpful visual record of the process.